Monday, November 1, 2010

Quinoa and Pistachio Stuffed Eggplant

Sometimes I'm ashamed to call myself a blogger because I don't write posts as often as I should. I have several recipes and pictures stashed away that I just haven't gotten a chance to post yet but I promise I will get through them slowly but surely. But first, I wanted to share an exciting adventure I've been up to the last couple of months.

On September 6th, the day after my 34th Birthday, I joined a 21-day vegan kickstart program. I decided to join for health reasons because chronic diseases run in my family. Also, out of curiosity, I wanted to see if I could actually do it. I sent emails to several friends and family members to join me but they all thought giving up meat, dairy, and eggs were too much of a sacrifice. I think they all probably thought they would have to eat "leaves" for 21 days. So, I set out on the quest on my own. "What have I gotten myself into!! I LOVE meat!!"

I'm proud to report that I survived the 21-day vegan challenge and lost 5.5 pounds at the end of it and a total of 8 pounds to date. Twelve more pounds to go! Woohoooooo!! And no, I didn't lose the weight from eating just leaves. In fact, I was surprisingly full most of the time because I ate foods rich in fiber, protein, and other nutrients but much less fat and practically no cholesterol.

Now, I don't want to offend true vegans by calling myself a vegan. I have to be honest and admit that I cannot deprive myself of meat, dairy, and eggs for the rest of my life. I guess I'm someone who eats a vegan diet most of the time. I will consume lean meat or fish maybe twice a month.

This experience has allowed me to see food in a whole new way and introduced me to new ingredients I wouldn't have tried otherwise, like lentils, quinoa, and agave nectar to name a few. Although the program gave a daily meal plan and recipes, I ended up only trying one recipe, which I did like very much. But, I found myself excited to create my own meals and thinking of ways to create vegan dishes that are packed with flavor.

When I saw Indian eggplants at the store, they're so cute I couldn't resist to buy them. These eggplants are about the size of hen's eggs. I already bought a package of quinoa at Trader Joe's that I haven't used so I thought this would be an opportunity for me to experiment. I also incorporated pistachios because I read an article recently stating that the Food and Drug Administration (FDA) released a qualified health claim that states eating 1.5 oz. (about a handful) of nuts a day may reduce the risk of heart disease.

I thought these eggplants were too cute to just cut up and cook so I decided to make them into little shells and stuff them. I used spices common in Indian cooking to make the filling and they turned out very aromatic and delicious.

Ingredients

8 Indian eggplants
3 shallots (diced)
2 garlic cloves (finely chopped)
1/4 C. chopped pistachios
1/8 t. coriander
1/8 t. cumin
1/8 t. cinnamon
1/8 t. nutmeg
1/8 t. turmeric
salt, or to taste
1/2 C. quinoa
1 C. coconut milk
olive oil
paprika

Cooking Instruction:

1. Preheat oven to 325 F.

2. Cut each eggplant in half lengthwise. Use a melon baller to scoop out the eggplant flesh, leaving about 1/4 inch thick shell. Make sure to keep the shell in tact. Cut the flesh into small cubes and place in a small bowl.

3. Rub the inside of each eggplant shell with olive oil. Place on a baking sheet and bake for about 20 minutes. Remove from oven and set aside.

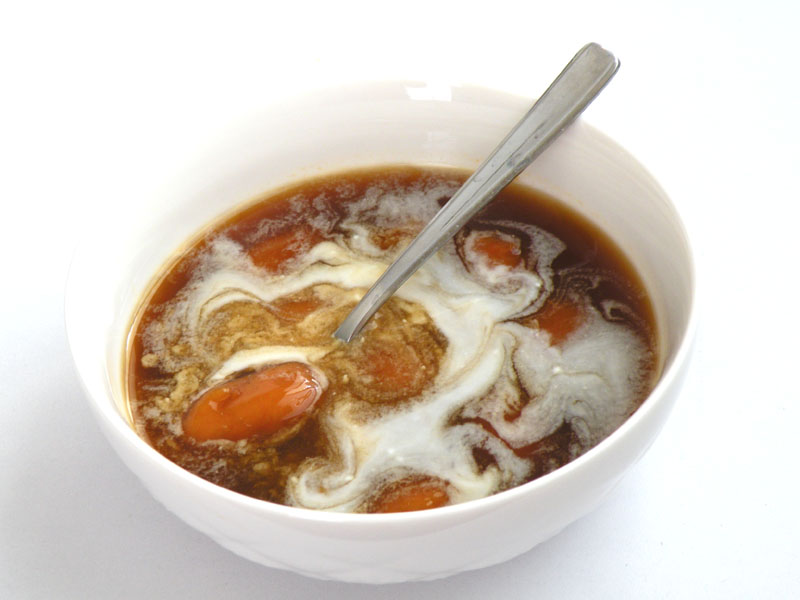
4. While the eggplant shells are baking, in a small pot, cook quinoa with coconut milk by bringing it to a boil, cover, then reduce heat to simmer for about 10-15 minutes. Remove from heat and let stand (with lid on) for about 5 minutes. Fluff with a fork and set aside.

5. Heat 2 T. olive oil on medium heat in a pan. Add shallots and garlic and cook for about 1 minute. Add eggplant cubes and all the spices (except paprika) and salt and cook for about 10 minutes until eggplants become soft. Turn off heat.

6. Add quinoa and pistachios to the eggplant mixture and stir to mix well.

7. Fill each eggplant shell with a generous spoonful of the eggplant/quinoa mixture. Sprinkle paprika on top.

Sunday, July 18, 2010

Zucchini Bread

I love zucchini in general and zucchini bread is like the icing on a cake. I got this zucchini bread recipe from my co-worker. The first time I had her zucchini bread was at one of our office potlucks several years ago. I think it was the best zucchini bread I ever ate. I was so happy she shared the recipe with me. Now I don't have to wait for the next potluck to take a bite of this scrumptious treat!

Recipe Courtesy of Karri Smith

Makes 2 loaves

Ingredients

Mix 1

3 C. flour
1 t. salt
1 t. baking soda
1 t. baking powder
2-3 T. cinnamon

Mix 2
2 ¼ C. sugar
3 eggs
3 t. vanilla
1 C. vegetable oil (I’ve used 2/3 cup oil and the bread is still moist!)

Cooking instruction:

1. Preheat oven to 325 degrees F.

2. Once Mix 2 is combined, stir in 2 to 3 cups of grated zucchini.

3. Add and combine half of Mix 1 at a time to Mix 2. Pour batter into 2 loaf pans (I used 1 bundt pan).

4. Bake for 60 minutes.

Saturday, July 17, 2010

Insalata Caprese

Insalata Caprese literally means "Salad, Capri style." This simple Italian salad only has 3 main ingredients: sliced tomatoes, sliced mozzarella, and fresh basil leaves. Just layer them around a platter and drizzle some extra virgin olive oil, balsamic vinegar (if you like), salt and black pepper.

I wanted to have a little fun so I decided to make the salad into bite size pieces. I used grape tomatoes and small mozzarella balls (you can find them in a small container). I cut the tomatoes in half, rolled the basil leaves, then skewer them with a toothpick. They make adorable and colorful appetizers.

Friday, July 16, 2010

Creamy Tomato-Basil Sauce

Today, I'm proud to announce that made pasta sauce from scratch for the very first time. I've heard many people say it's so easy but somehow I've been intimidated by it. I went to the market to pick up a bottle of pasta cause and a Creamy Tomato-Basil sauce caught my eye. Then I got the urge to try to make it myself. So, I read the ingredients on the bottle. Hmmm...the basic ingredients seem simple enough, it's just going to be a matter of figuring out how much of each ingredient to get. What really opened my eyes while reading the ingredients was that there are so many unnecessary additives and preservatives in the sauce you buy at the store.

So I got really excited about making it myself. I put the bottle back on the shelf and picked up fresh ingredients to make my very own Creamy Tomato-Basil Sauce. Oh my goshhh....I can't believe I waited this long to try it!! I'm going to become one of those people who will say "it's so easy!" :) I cant' wait to try making other sauces.

The sauce came out delicious. I can really taste the freshness of the tomatoes and basil that I can't get from sauce that come in a bottle. I served the sauce with Linguini and Pan Fried Fish Fillet. Next time I'm going to try it with seared scallops...yummm!

Makes about 5 cups

Ingredients

10 Roma tomatoes, quartered
1 large onion, diced
6 garlic cloves
10-12 fresh basil leaves
1 t. sugar
Salt and pepper, to taste
1 C. heavy cream
3 oz. aged Asiago cheese
1/4 C. extra virgin olive oil
2 T. butter
Crushed red pepper (optional)
Pasta of your choice, cooked according to box instruction

Cooking instruction:

1. Heat oil in a large pan. Add onions and garlic and sautee for 3-4 minutes until onions turn opaque.

2. Add tomatoes, basil, sugar, salt and pepper. Simmer for about 8 minutes. Turn off heat.

3. Stir in butter until melted.

4. Transfer tomato sauce into a blender or large food processor. Add heavy cream and cheese, and blend for 15-30 seconds.

5. Pour back into pan and cook until just bubbling, then turn off heat.

6. Serve hot with pasta. Add crushed red pepper, if desired.

Wednesday, July 14, 2010

Zuppa Toscana

Zuppa Toscana is one of the soup offerings at the Olive Garden chain restaurants and it's my favorite! It's a creamy soup with Italian sausage, potatoes, and kale. I rarely eat at the Olive Garden but once in a while I would crave a bowl of Zuppa Toscana.

I searched online for the recipe and apparently there are quite a few people out there who also love this soup. The recipe I used is adapted from Tuscan Recipes website. The site states that someone who used to work at the Olive Garden gave them the original recipe and it's been adapted to serve 6-8 people. I couldn't resist...I had to try it and I'm glad I did! It's very close to the original. If you're a fan of Zuppa Toscana, the next time you crave it, try this recipe and enjoy a hearty bowl in the comfort of your home.

Makes 6-8 servings

Ingredients

1 lb. hot Italian sausage (ground)
1/2 t. crushed red peppers (more if you like spicy)
1 large onion, diced
2 cloves garlic, minced
1/4 C. bacon, diced
4 red potatoes, cut into 1" cubes
10 C. water
5 bouillon cubes
1 C. heavy cream
4 Kale leaves, chopped

Cooking instruction:

1. Saute sausage and crushed red pepper. Drain fat and set aside.

2. Saute bacon until crispy, set aside. In the same pot, saute onions and garlic on medium heat until soft, about 10-15 minutes.

3. Add in water, bouillon cubes, and bring to a boil.

4. Drop in potatoes and cook until soft, about 20-30 minutes.

5. Add heavy cream and stir. Then add kale leaves, sausages, and bring to a boil.

6. Serve hot and top with the crispy bacon pieces and more crushed red pepper, if desired.

Spicy Braised Kale (Padang Style)

There is a traditional Indonesian side dish from the city of Padang called Sayur Daun Singkong (Braised Cassava Leaves). Since cassava leaves are hard to find where I live, I found that Kale is a great substitute for this dish. Collard greens is another option to use although so far I've only made this dish using Kale.

My family can't get enough of this so I usually make a large batch at one time. But food containing coconut milk won't keep for too long in the refrigerator so what I do is take enough for us to eat for about 1-2 days then divide the rest into several containers to keep in the freezer for later on in the week...or even the following week.

Makes 8-10 Servings

Ingredients

4 bunches Kale
5 shallots
3 cloves garlic
3 red chili
5 Thai chili (or more)
5 candlenuts (kemiri)
1 medium tomato
1 t. minced ginger
1/2 inch galangal root
1 T. salt
1 T. turmeric
1/2 T. ground coriander
2 T. oil
2 cans coconut milk
4 C. water
4 bay leaves

Cooking instruction:

1. Remove stems from Kale. Cut leaves into 1" pieces. Set aside.

2. In a food processor, puree the next 11 ingredients.

3. Heat oil in a large and deep pan. Pour in the spice puree and stir for about 2 minutes.

4. Add coconut milk, water, bay leaves, then bring to a boil.

5. Slowly add in Kale and simmer for about 10 minutes. Serve with hot jasmine rice and/or meat accompaniment (like Pan Fried Fish Fillet or Beef Rendang).

Tuesday, July 13, 2010

Pan Fried Fish Fillet

A while back I was at the market and saw Swai fish fillets on sale. I don't think I ever remembered seeing Swai fish before but decided to buy them anyway to try. Once I got home, I "googled" Swai and found out that it's a river catfish farmed exclusively in Southeast Asia. The ones I bought stated it's farm-raised in Vietnam. They look similar to catfish or tilapia.

I was kind of bored with just seasoning with salt and pepper when pan frying fish so I experimented on something new. It turned out to be the easiest seasoning ever and works really well with white fish. You still get the natural sweetness from the fish with added burst of flavor! This is probably how I'll cook white fish for the rest of my life! :)

And what's great is that this seasoning makes the fish quite versatile. I've eaten it "American" style with potatoes and vegetables, "Italian" style with pasta, and "Indonesian" style with Spicy Braised Kale....the possibilities are endless!

Ingredients

White Fish Fillets (like Swai, Cod, Tilapia, Halibut, etc.)
Garlic Salt
Mrs. Dash (Original Blend)
Oil

Cooking instruction:

1. Make sure fish is fully thawed and pat dry.

2. Lightly sprinkle with garlic salt. Then sprinkle Mrs. Dash more generously. Turn and season the other side.

3. Heat skillet on high. Drizzle about 2 T. oil.

4. Place 1-2 fillet at a time and cook for about 2.5 minutes on each side.

Monday, May 31, 2010

Biji Salak

I'm so glad whatever attacked me earlier this week is finally out of my system. So I was ready for another cooking adventure. This time, I made "biji salak", an Indonesian dessert.

"Biji salak" consist of sweet potato balls swimming in an infusion of sweet palm sugar syrup and rich coconut milk. The name "biji salak" literally means the "seed" of the salak fruit. It is because the shape of the sweet potato balls resembles it.

This was my first time making biji salak. The tricky part was rolling the sweet potatoes because it was a bit sticky but after rolling 10 or so I got the hang of it. Overall I think they turned out pretty good.

Ingredients

3-4 medium size sweet potatoes
1/2 C. tapioca starch, plus more for dusting
1/2 C. palm sugar
4 C. water
2 C. coconut milk
1 t. salt

Cooking instruction:

1. Peel sweet potatoes and steam until soft.

2. In a large bowl, mash the sweet potatoes while they're still hot and let cool. Then mix in tapioca starch.

3. In a large pot, bring water to a boil.

4. Dust your hands with some tapioca starch then roll the sweet potato dough into small balls then shape like "biji salak." Drop them into the boiling water. When they float to the top, take them out and set aside.

5. Melt palm sugar with 4 cups of water. Add in the "biji salak."

6. In a separate pot, heat coconut milk and 1 t. salt.

7. Serve warm "biji salak" with a few tablespoons of coconut milk.

Singkong Goreng (Fried Cassava)

Wouldn't you know it!! Just a few days before this Memorial weekend, I was hit pretty bad by some kind of virus. Starting Wednesday afternoon, I had chills, body ache, fever, headache, and nausea. There's nothing worse than spending the long weekend being sick. And although my ultimate goal is to rest this weekend, my heart just couldn't bear it if a whole long weekend went by without cooking. I felt better on Sunday so I happily made my way into the kitchen...yeay! :)

I went to the store earlier this week and saw cassava roots and had a sudden craving for deep fried cassava. Cassava is plentiful in Indonesia and versatile in its uses. It is common to find cassava used in a variety of Indonesian snacks and desserts.

Ingredients

2 cassava roots
1.5 T. salt, or to taste
3 cloves garlic (minced) or 2 T. garlic powder
1 T. ground coriander
water
oil for frying

Cooking instruction:

1. Peel the cassava skin and divide the length of the cassava root into 4 (approx 2-2.5"). If the root is thick, cut the round in half.

2. Place the pieces into a stock pot and add salt, garlic, and coriander. Cover with water.

3. Boil the cassava until tender. Drain and let the cassava cool down a bit and dry out (so you can avoid splatters when frying).

4. Heat 2" oil in a frying pan. Deep fry cassava until golden brown. Serve while still hot and crispy. Yummmm!!

*Note: You can let the cassava soak in the seasoned water for a couple of hours or even overnight before boiling, depending on how much time you have.

Wednesday, May 19, 2010

Nasi Uduk Komplit (Coconut Rice with all the Fixins)

I have two very special moms...but busy moms! So we celebrated Mother's Day one week late this year. I decided to make a traditional Indonesian meal called Nasi Uduk, which means mixed rice. The rice is cooked in coconut milk and served with a variety of side dishes. For this meal, I made ayam goreng kuning (yellow fried chicken), tahu goreng (fried tofu), perkedel (potato fritters), rendang daging (beef rendang), teri kacang (spicy anchovies and peanuts), and telor dadar (omelet). Since this was a special occasion, I created a "tumpeng" - a decorated platter where the rice is molded (typically into a cone shape) and the side dishes are arranged around it. My sweet friend, Anne, who's like a sister to me, helped with the set-up and decoration and we had a blast!

Here are the lovely moms with the tumpeng - they were quite happy! :)

Nasi Uduk

6 C. uncooked jasmine rice
6 C. coconut milk
2 t. salt
3 stalks lemongrass
4 bay leaves
1 t. ground coriander

Cooking instruction:

1. Combine all ingredients inside the rice cooker. Stir a little then cook in the rice cooker until done. Once done, open the rice cooker and mix the rice.


Ayam Goreng Kuning & Tahu Goreng (Yellow Fried Chicken & Fried Tofu)

2 cornish game hen (cut into quarters)
1 pkg. firm tofu (cut into triangles)
6 shallots
3 cloves garlic
4 candle nuts
1 inch fresh ginger root
1 T. turmeric powder
1/2 T. ground cumin
1/2 T. ground coriander

Salt and Pepper, to taste
4-5 C. water
Oil for frying

Cooking instruction:


1. Place the chicken pieces inside a large stock pot.

2. Blend all seasonings in a food processor then pour into the pot to coat all the chicken pieces.

3. Pour enough water to cover the top of the chicken. Bring to a boil then continue to simmer
until the chicken are cooked all the way through. Carefully remove chicken pieces. Drop the tofu in the leftover chicken marinade and boil for 10 minutes. Remove and set aside.

4. Heat oil in a large frying pan. Deep fry chicken pieces and tofu until golden brown.


Perkedel (potato fritters)
8-10 small red potatoes (cut into cubes)
1 can corned beef
3 T. fried shallots
2 cloves garlic (minced)
1 t. ground nutmeg
1/4 C. chopped celery leaves
Salt and pepper, to taste
1 egg yolk
1 egg white

Oil for frying

Cooking instruction:

1. Fry the potato cubes until light brown. Drain on paper towel then transfer into a large bowl and mash.

2. Add corned beef, egg yolk, garlic, shallots, nutmeg, salt, and pepper and mix well.

3. Take a spoonful of potatoes, roll into a ball, then press to flatten them. Continue until all potatoes are used up.

4. Heat oil in a frying pan. Place the egg white in a small bowl. Roll each potato fritter in the egg white then fry a couple of minutes on each side or until golden brown.

Short-Cut Dishes

I was pressed for time so I took a short cut on a couple of dishes by using ready-made seasonings. I'm blessed to have a good friend who owns an Indonesian online grocery, IndoKiosk. You can find all kinds of Indonesian cooking spices, snacks, and desserts. Just place your order online and she'll ship all the items to you (within U.S. only). Although nothing can beat making a dish from scratch, I find that the taste come pretty close. I used Bumbu Munik brand to make the Teri Kacang and Beef Rendang.

Teri Kacang (Spicy Anchovies and Peanuts)
1 pkg. teri kacang seasoning (Bumbu Munik brand)
1 pkg. raw peanuts
1 pkg. anchovies
1/2 can shoestring potatoes (I used Pik-Nik brand)

Cooking instruction:

1. Heat oil and fry peanuts and anchovies. Drain on paper towel.

2. Spread shoestring potatoes, peanuts, and anchovies in a 9 x 13 baking dish.

3. I first tried to follow the instruction on the seasoning package but it didn't quite work
because the paste was too thick. So I removed the seasoning from the package, place it in a small bowl, added about 2 T. water, and heated it in the microwave for 1 minute. Mix well then pour onto the peanut, anchovies, and potatoes. Use a large spoon to mix well and make sure they're evenly coated.


Beef Rendang
2 lbs. beef shank (cut into large chunks)
1 pkg. beef rendang seasoning (Bumbu Munik brand)
Water, as needed

Cooking instruction:

1. Place beef chunks and beef rendang seasoning into a stock pot and cover with water.

2. Bring to a boil then simmer until water is reduced to a thick sauce. If beef is not tender, add more water and repeat the process. Since I used beef shank, it took about 3 hours to tenderize the meat. Do not add more salt even if you have to add more water since the water will eventually evaporate but the salt will remain.

Sunday, May 9, 2010

Roasted Lamb with Couscous and Feta Cheese

I still had leftover herb roasted rack of lamb and potatoes from dinner the other night and wanted to change it up a bit for lunch today.

I have a box of couscous in the pantry and some feta cheese so they were going to be the perfect combination. I basically followed the cooking instruction from the box but I tweaked the seasoning a bit. Boil 1-1/4 C. water with 1/4 cube of chicken bouillon. Then add 1 C. couscous and 2 T. butter and cook for about 1 minute. Remove from heat and let stand for 5-8 minutes. Fluff with fork before serving.

I removed the ribs from the lamb and thinly sliced the meat and drizzle with the
port-wine sauce. Serve with the roasted potatoes and couscous topped with the feta cheese crumbles. Ta-dah...lunch is served!

Herb Roasted Rack of Lamb with Port-Red Wine Reduction Sauce

OK, I admit it...I'm officially a slacker! :( I can't believe I didn't post any recipes for the whole month of April.

In an attempt to make it up to myself and some friends who've been asking about new posts, I decided to try something I've never made before - roasting a whole rack of lamb. I personally am not a big fan of lamb. Although I did remember tasting the roasted rack of lamb (that hubby ordered) from Ulysses Voyage at The Grove's Farmers Market in Los Angeles and it was delicious. The meat was cooked perfectly (I prefer medium-rare) and it didn't have a strong gamey taste, which is what I dislike about lamb.

My hubby, on the other hand, loves lamb. Since he's been feeling under the weather for the last few days I decided to surprise him with a dinner date in our back patio on Saturday (yes, I'm
the romantic one in the relationship).

I was a bit intimidated with the idea of roasting a rack of lamb so I browsed the internet for recipe ideas. Surprisingly, I found out that it's not as complicated as I had imagined. But, since this was my first time, I decided to use a simple herb seasoning. I'm proud to say it came out tasty, tender, and juicy...and the best part of all, hubby's tummy's happy!

Ingredients


8-bone Rack of Lamb
Sea salt
Black pepper
Granulated garlic powder
Extra Virgin Olive Oil
1 sprig Rosemary (crushed)
1 T. Thyme

Cooking instruction:

1. Place rack of lamb in a roasting pan. Sprinkle salt, pepper, and garlic powder on both sides of lamb. Drizzle with olive oil and sprinkle Rosemary and Thyme. Rub all over lamb to make sure it's all coated well. Cover with plastic wrap and place in refrigerator for at least 2 hours or overnight.

2. When you're ready to roast the lamb, preheat oven to 400 F.

3. Heat 2 T. olive oil in a large skillet until very hot. Sear the rack of lamb until brown, about 2-3 minutes on each side.

4. Transfer lamb back into roasting pan, bone side down. Cover with aluminum foil and roast in the oven for about 12-18 minutes, depending on how you like the meat cooked. With a meat thermometer, take a reading of the center of the meat about 10-12 minutes into cooking.

Note: Allow internal temperature to be 5 to 10 degrees less than you like because the meat will continue to cook while it sits. Bloody rare: 115 to 125 F; Rare: 125 to 130 F; Medium rare: 130 to 140 F; Medium: 140 to 150 F.

5. Let meat rest for 5-10 minutes before carving between the ribs. Serve with your favorite side dish - I made roasted potatoes and carrots because that's what I had. Mashed potatoes and/or asparagus would make great sides also.

Port-Red Wine Reduction Sauce

1 C. red wine
3/4 C. port wine
1 sprig Rosemary
2 T. chilled butter
Sea salt
Black pepper

Cooking instruction:

1. Place Rosemary sprig, red wine, and port wine in a hot sauce pan. Bring to a boil and simmer until liquid is reduced to about 1/2 cup, about 30 minutes.

2. Remove from heat. Add chilled butter and stir until melted.

3. Add salt and pepper before serving.

Friday, March 19, 2010

Pepes Tahu

It's "no meat" Friday during Lent season and I really don't want to eat salad today :) So I made an Indonesian vegetarian dish called Pepes Tahu (Wrapped Tofu). It's mashed tofu mixed with spices, wrapped in banana leaves. It's steamed, then grilled. This dish is flavorful, filling, and packed with protein so it's almost like eating meat...without the extra fat and cholesterol!

Makes about 6

Ingredients

2 pkg. soft tofu
20 fresh Thai basil leaves
5 shallots
2 garlic
2 red chili
6 Thai chili
2 t. salt
2 t. sugar
12 dried or fresh bay leaves
Banana leaves

Cooking instruction:
1. Drain tofu and place in a large bowl. Add basil leaves.

2. In a small food chopper, minced shallots, garlic, red chili, thai chili, salt, and sugar. Then add to tofu bowl and mash together.

3. Place 1 bay leaf on top of a banana leaf then take a few tablespoons of tofu mixture and spread on top. Top with another bay leaf then fold and seal each side with a toothpick or staple. Continue until all the mixture is used up.

4. Steam the wrapped tofu for about 20 minutes then grill for a few minutes on each side until dry. Serve with hot steamed rice.

Wednesday, March 17, 2010

Tod Man Plaa (Thai Fried Fish Cake)

I eat out at a Thai restaurant pretty often and 99% of the time, I would order the fried fish cake as the appetizer. With the leftover fish paste I had from making otak-otak, I decided to try making this dish. I've been a fan of ImportFood.com, an online grocery store specializing in Thai spices, produce, and cookware for a few years now. Even though I've never had the need to purchase the spices since I live in Southern California and don't really have any problems getting them, I love browsing the extensive amount of Thai recipes available on their website. They're easy to follow and most have step-by-step pictures, and even videos of actual Thai street vendors cooking the dish. I've tried a couple of recipes in the past and they came out very good. This was no different...they came out so good and taste just like at the restaurant.

Recipe Source:
Import Food (I did add the tapioca starch and flour to the recipe since I used fish paste and the mixture was too soft)

Makes about 20 fish cakes

Ingredients

1 lb. fresh white fish like cod or halibut (or fish paste)
1 egg

3/4 C. finely sliced Chinese longbean, or stringbeans

6 fresh kaffir lime leaves, finely sliced

1 t. sugar

1 t. salt

1.5 T. red curry paste

2 T. tapioca starch

1 T. flour

3 C. vegetable oil for frying


Cooking instruction:

1. Cut the fish into small pieces, then grind it up in a food processor until it's a paste. Transfer to a large mixing bowl, and add the rest of the ingredients (except the oil). For spicier taste, ad
d a bit more red curry paste.

2. Using your hands, knead the mixture until sticky enough to form it into a disc about 2 inches wide and 1/2 inch thick. Heat oil in a wok or frying pan at med/high heat.

3. Add fish cakes and fry until golden brown on both sides. Remove with a slotted spoon and drain on paper towels. Serve warm with a dish of cucumber relish which is to be spooned
over the fish cakes at the table.

Cucumber Relish
1/2 C. white vinegar
1/2 cup sugar

1 cucumber, coarsely chopped

3 shallots, finely sliced

1-2 fresh Thai chili, sliced

1 T. crushed roasted peanuts


Cooking instruction:

1. Cook vinegar and sugar in small saucepan over low heat until the sugar dissolves. Let cool.


2. In a small serving bowl put cucumbers, shallots and Thai chile. Pour vinegar mixture over that, then top with roasted peanuts.

Otak-Otak (Grilled Fish Cake)

I love otak-otak! It's one of my favorite snacks since childhood. It is very popular in Indonesia, Malaysia, and Singapore although each region has a slight variation on how to cook them. Indonesian otak-otak consist of fish paste seasoned with spices, then wrapped in banana leaf and grilled on charcoal fire. It's served with peanut dipping sauce. Making them does take some prep time but it's so worth it!

Makes about 40


Ingredients

2 lbs. fish paste
2 egg whites
1 C. coconut milk
1/2 C. tapioca starch
1 t. salt
2 t. sugar
1 t. ground white pepper
2 shallots
1 clove garlic
3 Thai chili (optional)
5 chives (sliced)
Banana leaves (cut into approx. 4" x 8" strips)

Cooking instruction:
1. In a large bowl, mix fish paste, egg whites, and coconut milk.

2. In a small food processor, mince together shallots, garlic, salt, sugar, pepper, and Thai chili. Stir the spices into the fish mixture. Mix in the chives.

3. Take a tablespoon of mixture, spread it on the inner edge of a sheet of banana leaf and then roll. Staple each end to seal.

4. There are 3 options to grill otak-otak. The traditional way is to grill them on a charcoal grill. If you have a gas burner, you can place a wire rack on top of it. Use low setting and place several otak-otak on middle of the rack. Turn a few times to make sure the leaves don't catch on fire. The third option is to place them in the oven at 300 F for about 10 minutes, then turn and bake for another 10 minutes. Serve with peanut dipping sauce.

Peanut Dipping Sauce

1/4 C. ground peanuts
1/4 C. ground candlenuts
2 red chili
5 Thai chili
1/2 C. warm water
1 T. white vinegar
1 T. sugar
Salt, to taste

Cooking instruction:
1. Combine all ingredients.

Tuesday, January 26, 2010

Gorgonzola Chocolate Truffles

I can't believe the first month of 2010 is almost over and I haven't posted one recipe yet! With the hecticness of the holidays, I've been slightly thrown off my cooking wagon...but I'm back!

With Valentine's Day just around the corner, I couldn't think of any better way to represent the essence of the day than through chocolate. Ah yes, nothing blends perfectly than Valentine's Day and Chocolate...but Chocolate and Gorgozola Cheese? I was a skeptic! -- that is, until hubby and I encountered Gorgonzola Chocolate Truffles at Kakawa Chocolate House during our trip to Santa Fe, New Mexico last year. Highly suggested by the concierge at our hotel, we had to stop by this small artisan chocolate company. And, I just had to take a picture in front of the adorable adobe structure!

Inside, we were presented with a variety of decadent and unique truffles, like Olive Oil, Chili, Hisbiscus, and Cardamon, to name a few. I wish I can try one of each but at $3 per truffle, we settled with 4 choices that we thought were the most unique (hisbiscus, olive oil, gorgonzola, and cardamon).

Our favorite was actually the Olive Oil Truffle. The smooth and creamy olive oil infused filling is covered in milk chocolate and sprinkled with sea salt...the blend of sweet, creamy, and a touch of saltiness dancing in your mouth was absolutely divine. Even hubby who's not a big chocolate lover was raving about it.

The Gorgonzola Truffle was second. According to its description, it consists of unsweetened chocolate, Gorgonzola cheese, honey, cream, and dried apples (see picture below). When I first bit into the truffle, I was expecting the gorgonzola cheese to overpower the chocolate, but surprisingly, the saltiness and richness of the cheese complement the chocolate very well.

That visit totally got me inspired to try my first attempt at making chocolate truffles. Because I've actually grown fond of gorgonzola cheese, I decided to recreate the Gorgonzola truffle. I have to admit the process was more time consuming than I imagined. And I had a bit of a hard time rolling the truffles and dipping them in the chocolate so they don't look as pretty. But I can get better at it with practice. :) At this point I was more concerned about the taste so overall, I was quite happy with how they turned out.

Makes about 3 dozens Truffles

Ingredients

1/4 C. heavy whipping cream
6 T. unsalted butter (cut into small pieces)
4 oz. Ghirardelli 60% Cocoa bittersweet chocolate bar (shaved)
4 oz. Ghirardelli semisweet chocolate bar (shaved)
5 oz. Gorgonzola cheese (crumbled)
8 rings of dried apples (diced)
8 oz. extra dark chocolate (for dipping)

Cooking instruction:

1. Combine the bittersweet chocolate, semisweet chocolate, and butter in a glass bowl.

2. In a small saucepan, bring cream to a simmer. Remove from heat and pour into chocolate bowl. Let stand for 1 minute.

3. Add Gorgonzola cheese and stir until chocolate has completely melted. You can heat the bowl in the microwave for 15 seconds at a time, if needed. Cool, cover, and refrigerate until firm, at least 2 hours.

4. Line a cookie sheet pan with wax paper. Dip a melon baller or small spoon into a glass of warm water and quickly scoop the truffle mixture. Press a piece of dried apple in the middle of the truffle, then form a 1-inch ball. Place onto the wax paper. Repeat with remaining truffle mixture. Return them into the refrigerator for 30 minutes.

5. In a small bowl, melt the extra dark chocolate. Take out chilled truffles from the refrigerator.

6. Place a truffle on top a fork and dip into the melted chocolate, tap or scrape off excess chocolate from the bottom of the fork then place it back onto the wax paper. Top each truffle with a small piece of dried apple. Let cool for at least 1 hour.

7. Serve at room temperature. Or place them in a candy box for a lovely sweet gift! :)

If you're visiting Santa Fe, don't miss:

Kakawa Chocolate House

1050 E. Paseo de Peralta

Santa Fe, NM 87501

http://www.kakawachocolates.com/

Related Posts with Thumbnails